How to build an outdoor rabbit pen...
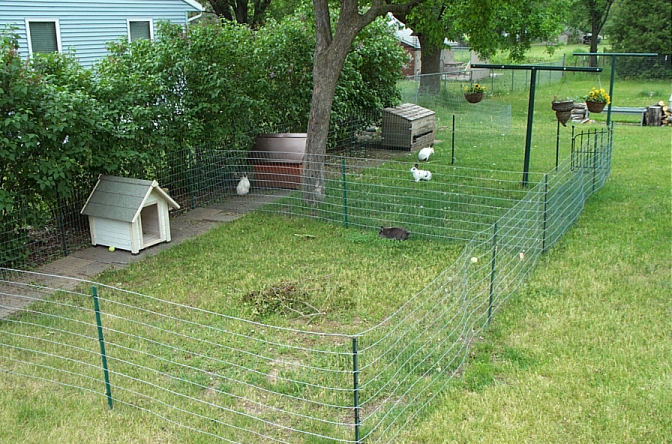
In Spring 2008 I built the rabbits new pens with iron gates
and little houses for shelter.
The rabbits are also allowed at different times to roam the rest of the yard and
garden with supervision.
They even have their own herb garden full of mint and basil where they can graze
and their pens are bordered by purple lilac bushes.
You can make a pen any size, but remember these important considerations. The pen is designed more to keep predators out than to keep the rabbits in. If there in enough room and fun stuff in the pen the rabbits probably won't try to get out. It is very important for the rabbits to have access to a shaded area at all time and for them to have shelter in case of rain. Never leave a rabbit outside if the temperature is over 80 degrees. Heat is much worse for a rabbit than cold (since they have fur coats). If you are going to have the rabbits outside often, it is a good idea to give them a flea treatment (only use Revolution for cats and kittens as it is safe). My rabbits live in the house, so this is merely a play area for them where they spend a few hours on nice days. I don't recommend keeping rabbits outside full time and you should regularly check on your rabbit when it is outside. Here is the large pen I built originally for four rabbits...
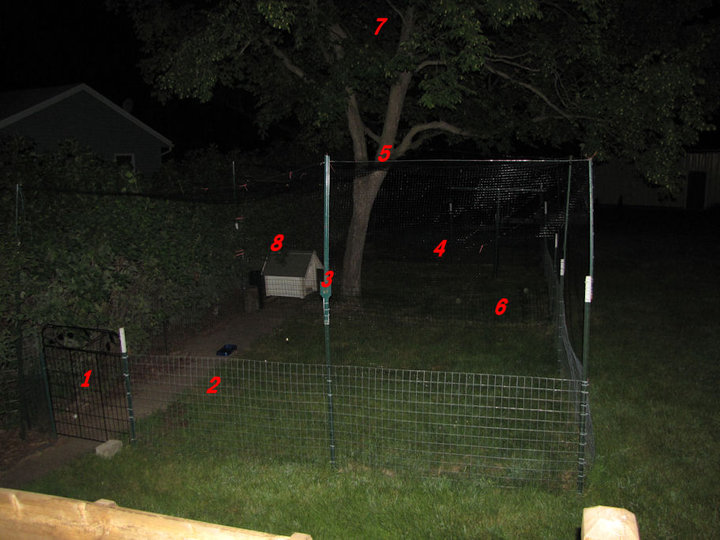
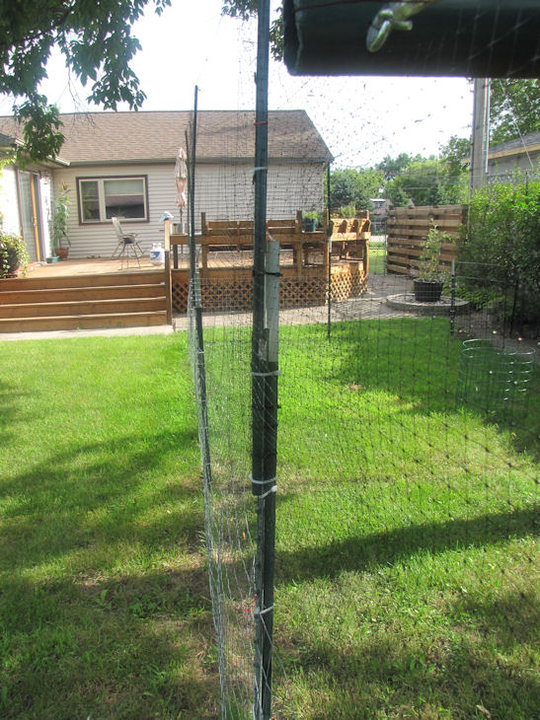
I took this at night so it's easier to see the netting. See numbers
on photo.
1. Be sure the gate is big enough to get the push mower through. I made
the mistake of too small of gate the first time I built one of these and
kicked myself.
2. Standard farm/garden fencing (36" high) with standard posts. Attached
with plastic zip ties for easy removal.
3. I doubled the poles up to hold up the net supports. Secured with zip
ties. Kind of ugly, but I had a bunch of posts.
4. The netting (usually called bird netting in the store) covers the top
and all the sides with holes only over the gates so you can walk in.
This keeps hawks and other predators out.
5. I used electric fence wire around the outside edges and radiating out
from the tree to support the top and sides of the net. Net is secured in
many places with small zip ties.
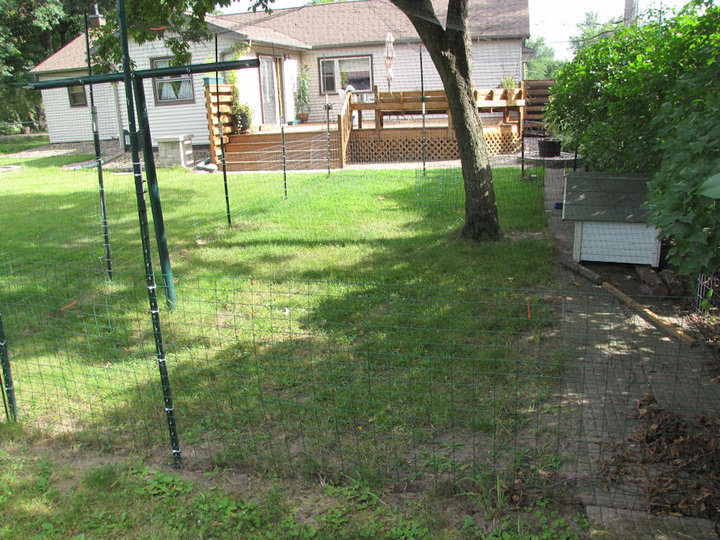
6. I have small movable piece of fence on the inside. I use it "shrink"
the size of the pen when I need to catch the buns to bring them in for
the night. I also can use it to keep them away from any holes they might
try to dig under the fence (the buns I have now don't dig though).
7. Tree in the middle for shade is very important to a happy bun. You
never want the bun to be where it can't get out of the sun at any time
of the day.
8. Dog house with some hay inside in case it rains.
9. Change the water dish everyday as lots of bugs and other nasty stuff can get in.